
 OpenMV
 Shields
 Lens
Lens Robotics
 Book
Book Video
Video Download
 Docs
Docs Forum
Forum OpenMV.io
 GithubOpenMVShieldsLensRoboticsBookVideoDownloadDocsForumOpenMV.ioGithub
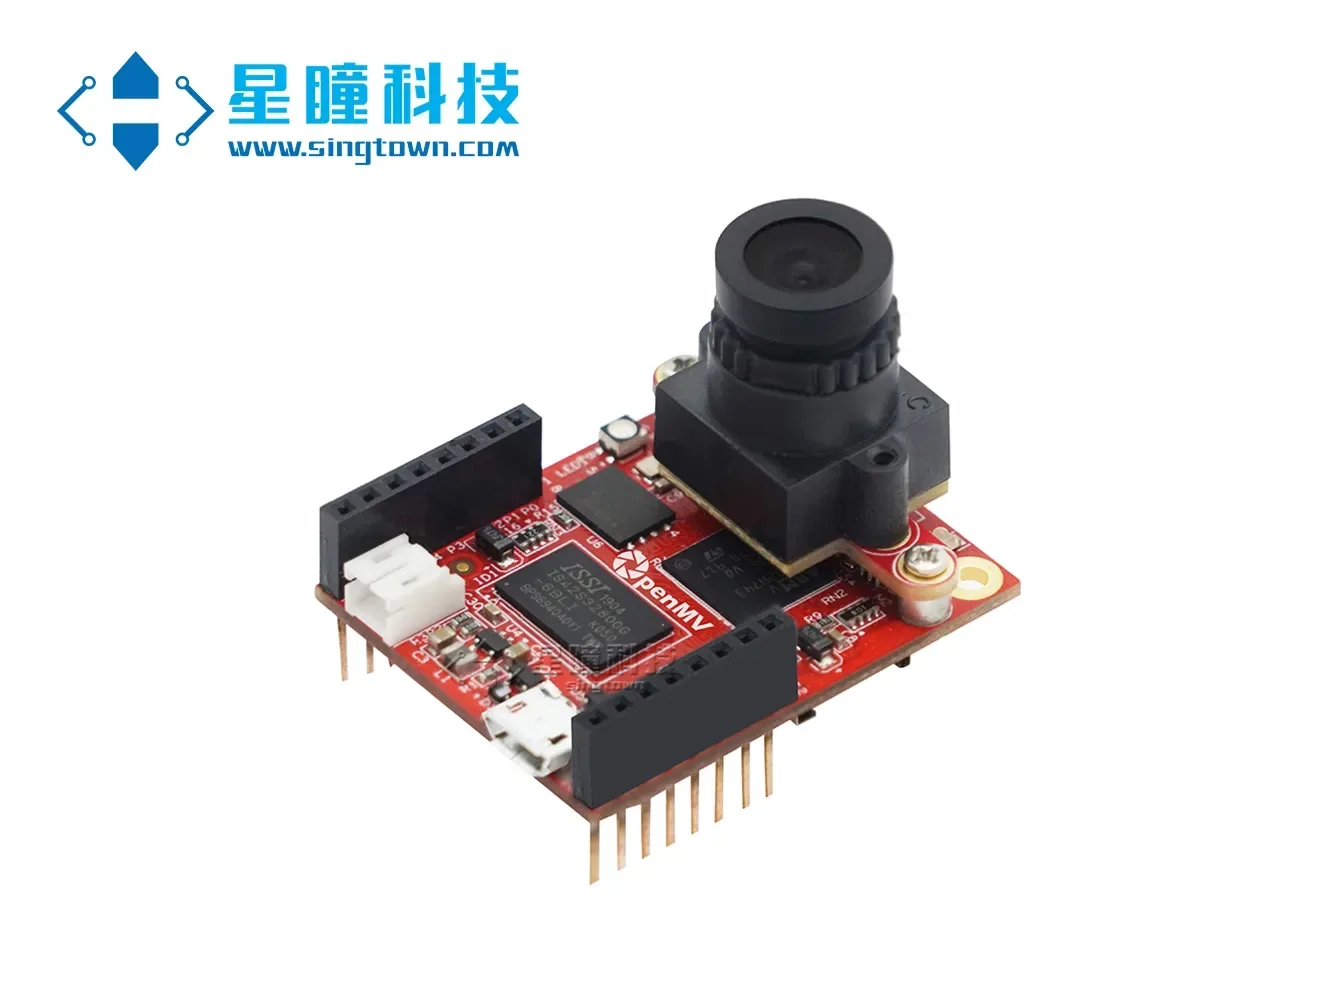
OpenMV4 Plus utilises Edge Impulse to independently train a neural network for face mask recognition.
Last April, our new product, the OpenMV4 H7 Plus, was launched. Today, I will introduce its new feature—using the EdgeImpulse online platform to independently train neural networks for classification and recognition.
In this tutorial, you will use machine learning to build a recognition system that can identify whether a person is wearing a mask through the OpenMV4 H7 Plus smart camera, achieving image classification.
EdgeImpulse is a website that provides online training services for neural network models on embedded devices. It is a partner of our OpenMV and also an official partner of STMicroelectronics. Currently, EdgeImpulse is freely accessible to our OpenMV users, allowing them to train neural network models online for OpenMV at no cost.
Adding neural networks to the embedded device OpenMV enables functions such as distinguishing poachers from elephants, performing quality control on factory production lines, and allowing remote-controlled model cars to drive autonomously.
In this tutorial, you will learn how to collect images to build a high-quality dataset, how to apply transfer learning to train a neural network, and how to deploy the system to OpenMV.
Additionally, we have provided video tutorials, which can be viewed by searching for "OpenMV4 Plus Training Neural Network for Mask Recognition" on the official website.
You can view the entire project content, including all code and models, at the following address: https://book.openmv.cc/project/mask.html
Using EdgeImpulse to train neural network models online for OpenMV primarily involves the following four steps: dataset collection, uploading, training, and deployment.
01. Data Collection Dataset
In this tutorial, we will build a model capable of distinguishing whether a face is wearing a mask. Of course, you may also choose to classify other objects. To enable the operation of the machine learning model, you need to collect a large number of example images of faces both with and without masks. During training, these example images are used for the model's differentiation exercises.
We need to use OpenMV IDE to collect our dataset. The steps for capturing images are as follows:
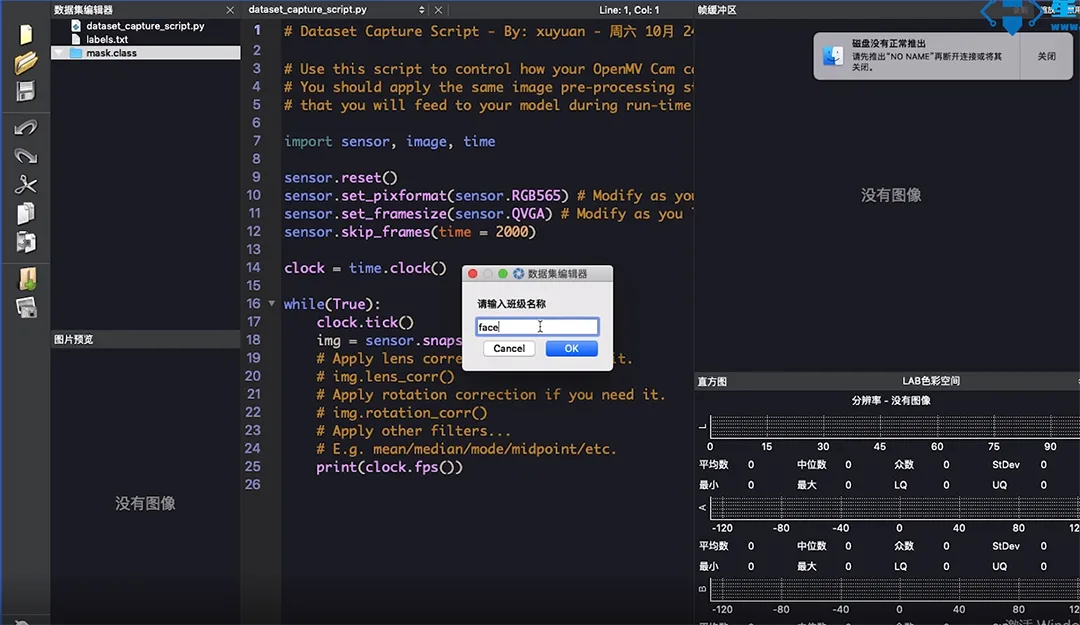
Create two categories:
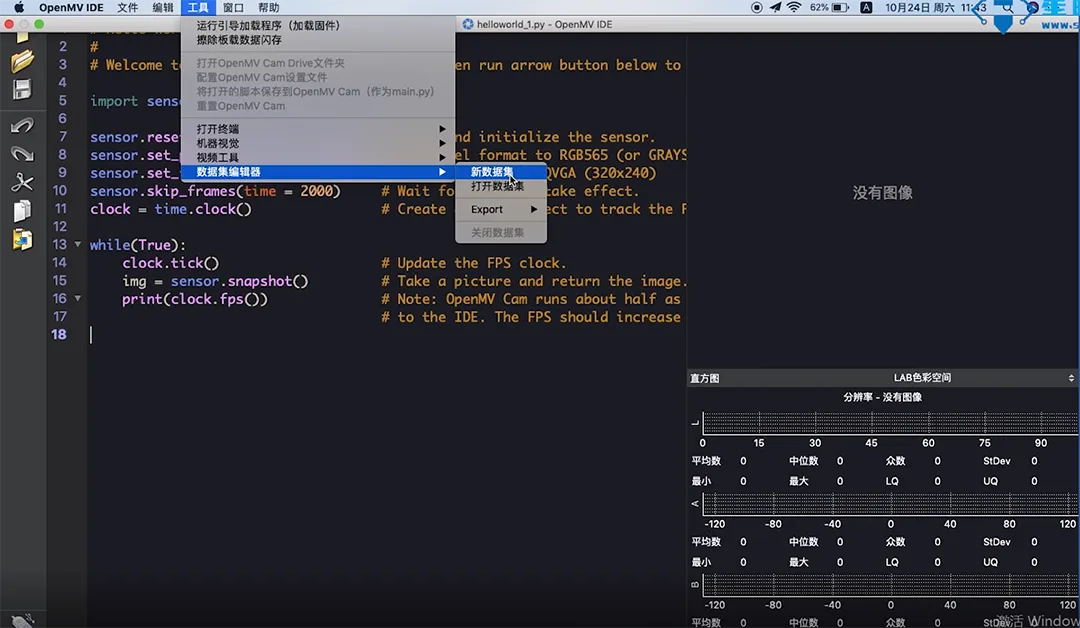
Open the "Tools" menu in the OpenMV IDE, select "Dataset Editor," click "New Dataset," then create a new folder and open it. Inside the dataset, create two more folders named "mask" (for saving photos of people wearing masks) and "face" (for saving photos of people without masks).
Collect images using OpenMV
First, we connect the OpenMV, click "Connect" in the IDE, then click "Run". In the Framebuffer, we can see the real-time image from the OpenMV. Click the photo button in the left menu bar, and the OpenMV will automatically save this image, which becomes one piece of data in the dataset.
First, we need to save the face of a person wearing a mask. Click the photo button, and the IDE will capture an image at the bottom, automatically naming it 00000. The next one will be 00001, and so on.
Collect 200 photos of faces wearing masks (100 each of males and females) and 200 photos of faces not wearing masks (100 each of males and females) using OpenMV respectively.
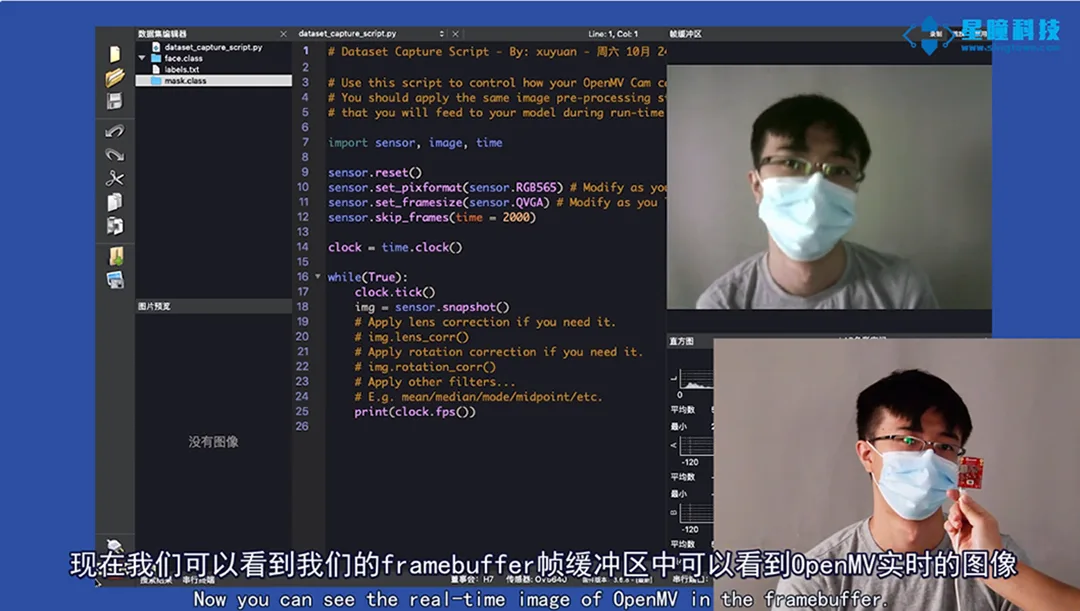
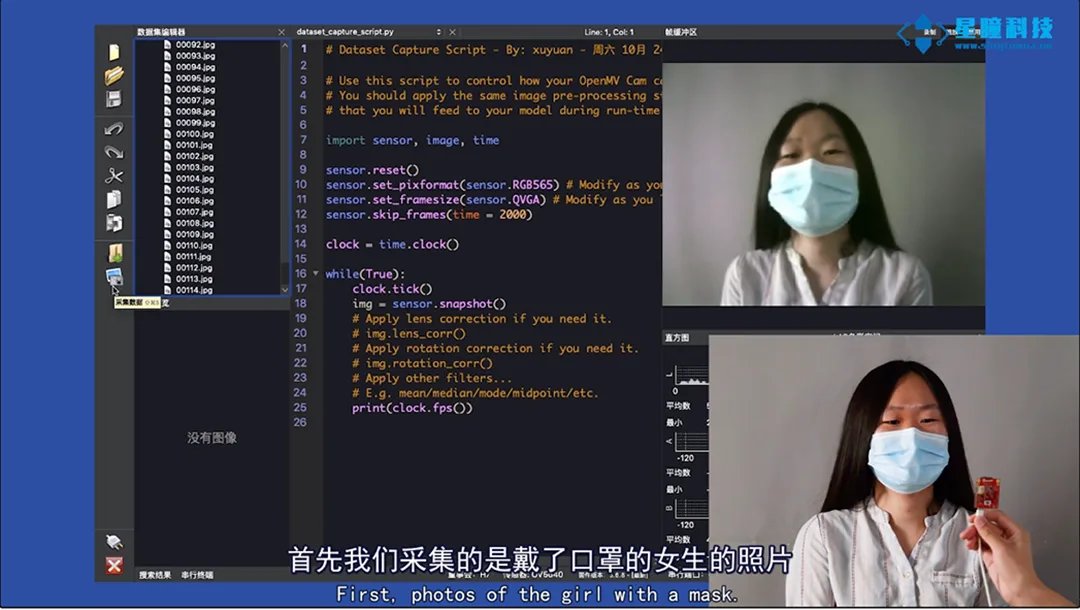
Note: Ensure photos are captured from various angles to guarantee diversity for our training and learning.
If during the collection process you find that a particular image is not captured perfectly, you can right-click on the image and select delete.
02. Upload
After capturing images with OpenMV, you need to register an account and log in to the EdgeImpulse official website (https://edgeimpulse.com/) to begin uploading images. The steps for uploading images are as follows:
Create a new project on EdgeImpulse, click on "keys", select "API Key" and copy the "API Key". Use the API Key to establish connectivity between OpenMV IDE and Edge Impulse.
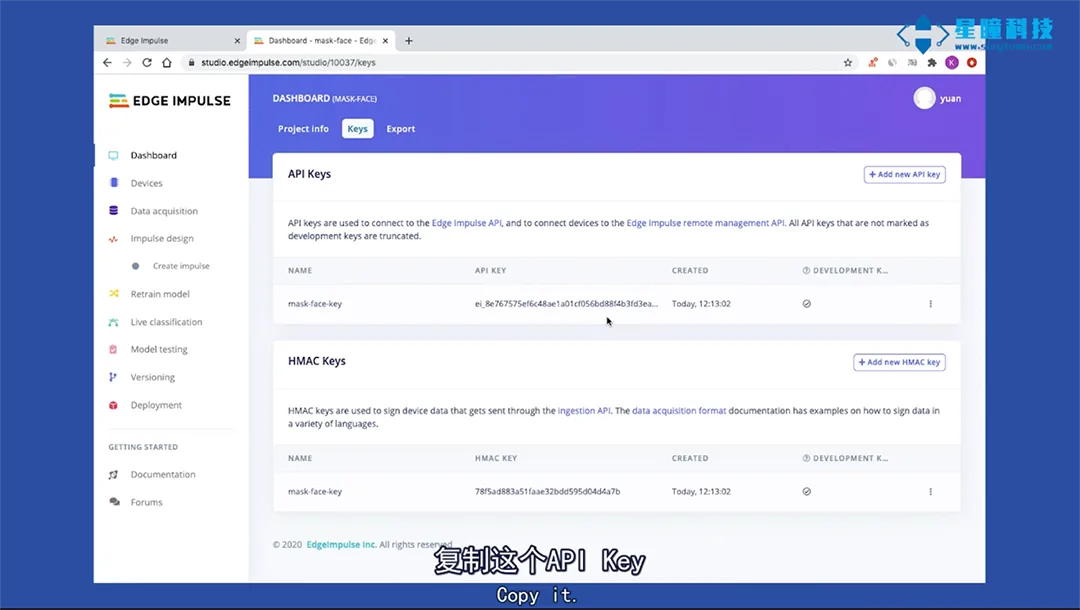
Select "Tools" – "Data Editor" – "Export" – "Upload" – "Upload via API Key" from the menu bar at the top of OpenMV IDE, then copy the "API Key" to upload.
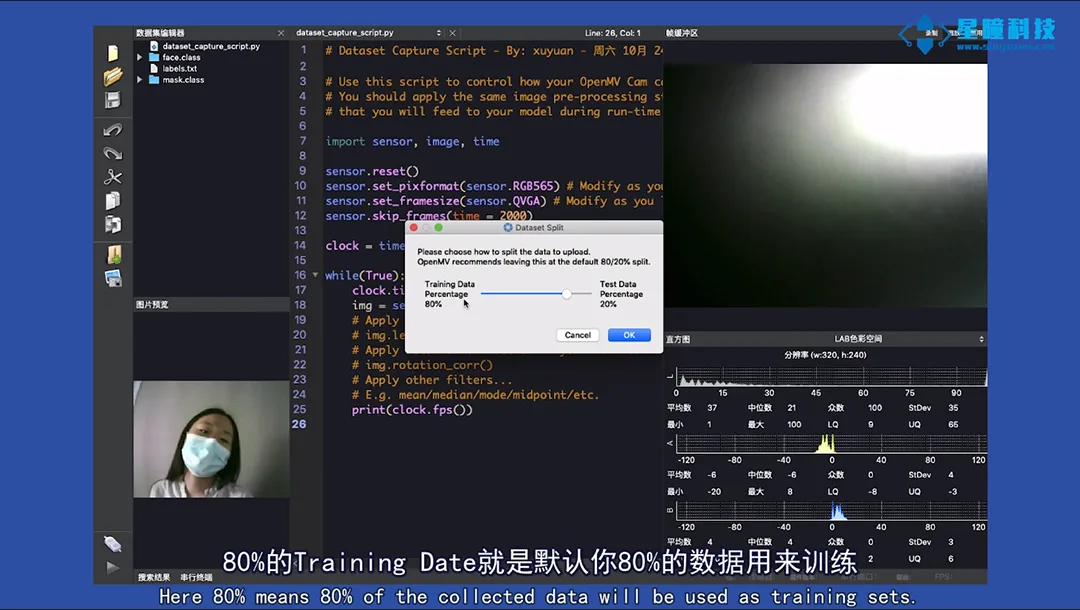
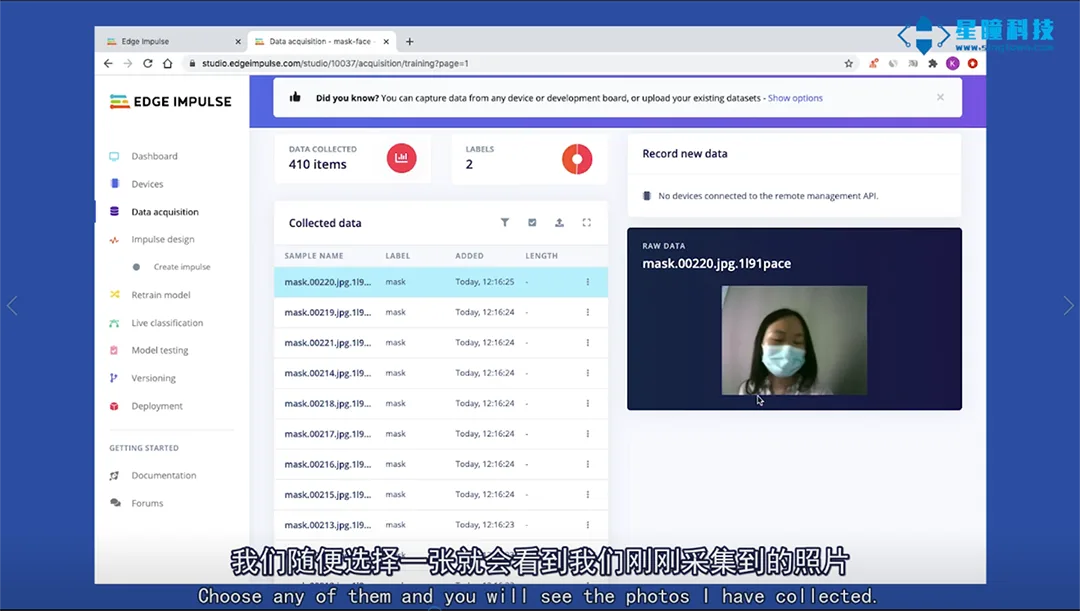
During upload, the data will be automatically split into training and test sets. We recommend using the default ratio of "80% and 20%". We have collected over 400 facial images in total, where 80% of the Training Data—meaning 80% of your data by default—is used for training, and the remaining 20% serves as the test set.
03. Training Dataset
Once the dataset is ready, you can train it on the EdgeImpulse website interface.
Configuration Processing Module:
First, select "Impulse Design" and configure the processing module:
Set the default image dimensions to "96 x 96".
Select the "Images" module, indicating that we are conducting classification training on images (you can also use EdgeImpulse to classify sounds, videos, etc.).
Select "Transfer Learning (Images)", configure the learning model.
Select "Save impulse", and if "Successfully" is displayed, the configuration is complete.
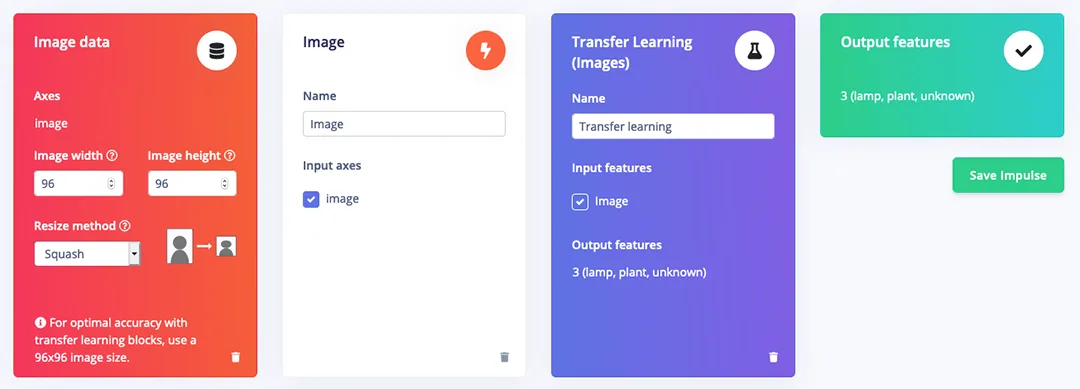
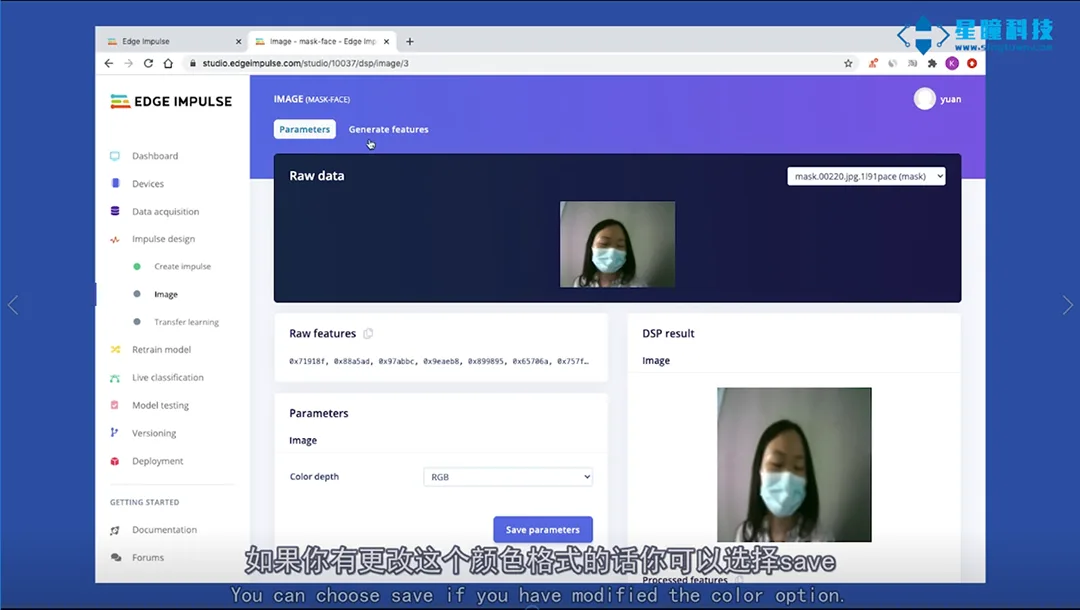
Image Preprocessing:
Click "Image" in the left-hand menu, set the colour format to "RGB", then tap "Save".
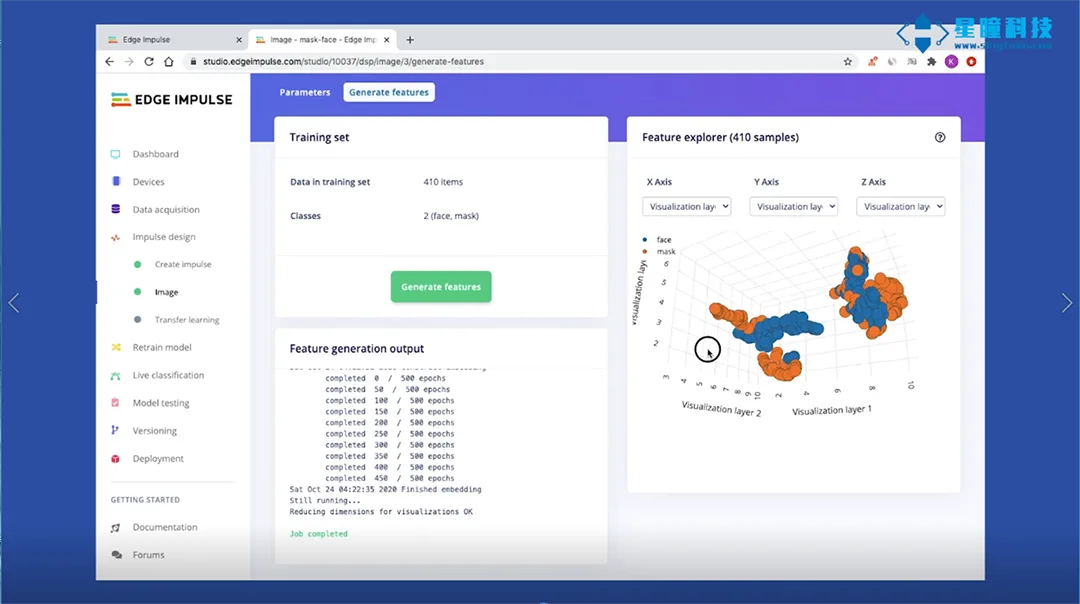
Next, select "Generate Features" to initiate the process. This will perform image preprocessing on over 400 data entries, with a 3D visualisation of the complete dataset displayed on the right.
Configure the transfer learning model
Click "Transfer learning" in the left-hand menu, and you can either accept all the default settings for the parameters or adjust them according to your requirements.
1. Set the default number of training cycles to 10
2. Set the learning rate to 0.0005
3. You may choose to tick or leave unticked the "Data augmentation" option.
4. Set the default Minimum confidence rating to 0.8.
Click "Start training". The training process takes approximately four to five minutes.
After the model training is complete, you can view the accuracy, confusion matrix, and expected device performance.
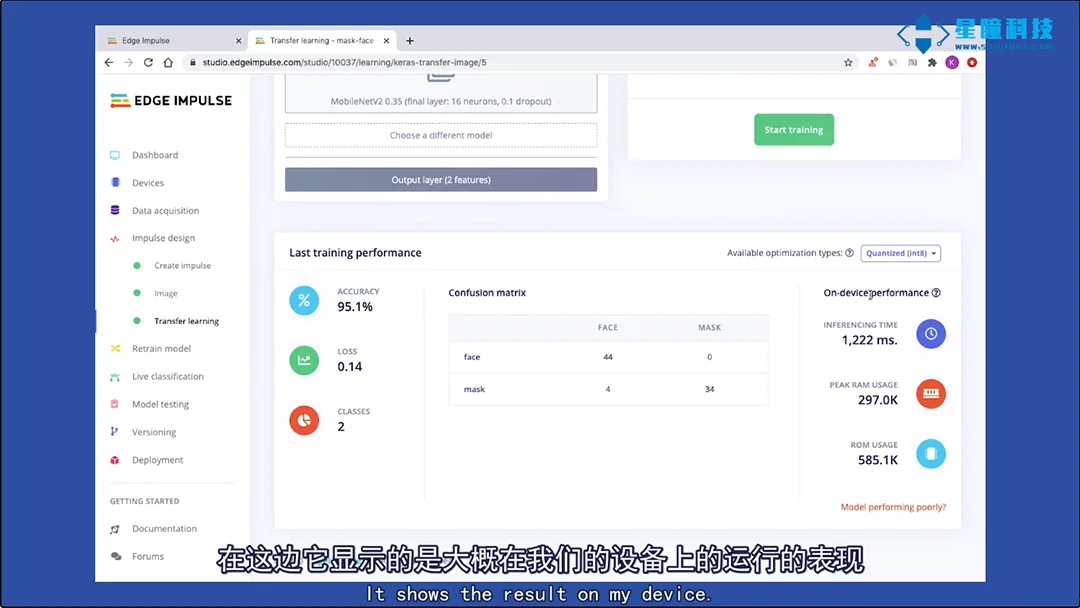
Testing model:
After training is complete, we will use test data to evaluate the model.
Select "Model testing", tick the checkbox next to "Sample name", and click "Classify selected". The accuracy displayed here has reached 97%, which is quite remarkable for a model with such limited data.
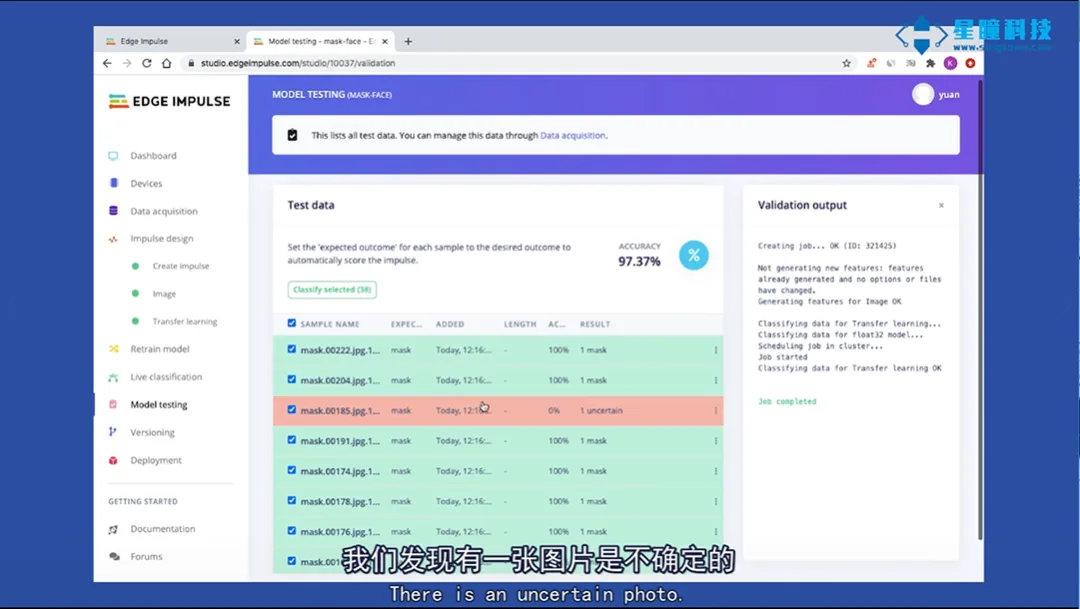
It has been found that the image displayed in red is uncertain. Click the three dots on the right side of this image, select "Show classification," and you will enter the "Real-time Classification" interface, which contains more details about the file. This interface will help you determine the reason for the image classification error.
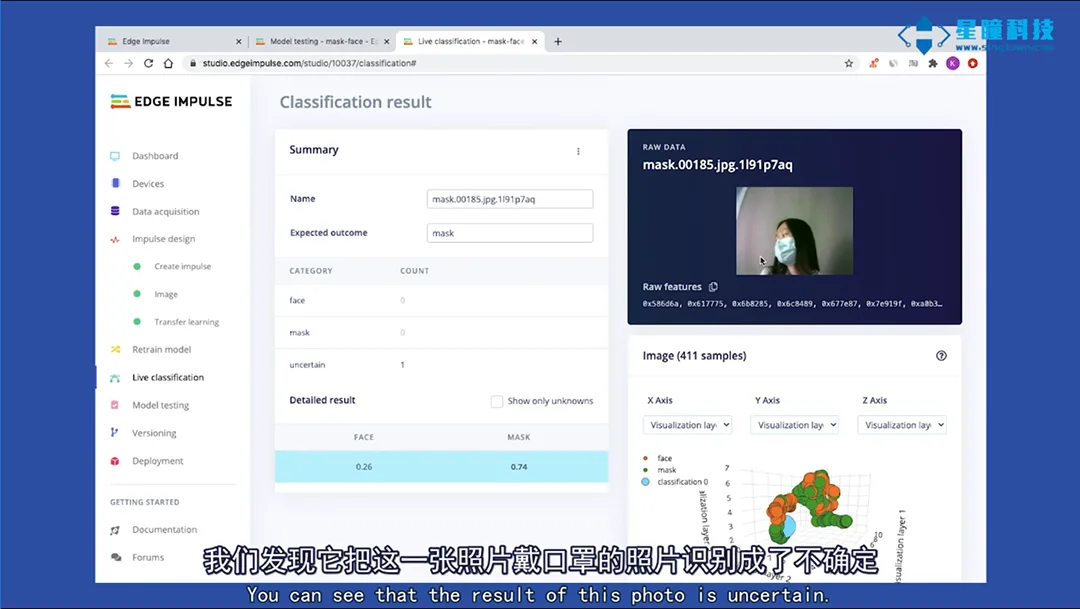
If the data falls outside all known clusters (wearing a mask/not wearing a mask), this may be data that does not match any previously observed classification—possibly due to hair covering most of the face.
04. Running the Model on OpenMV
After completing the steps of training design, model training, and model validation, you can export this model to your OpenMV. Select "OpenMV", choose "Build" to generate, and it will automatically create three files.
trained.tflite trained neural network model
Two classification labels in labels.txt (face and mask)
ei_image_classification.py is the code to be run on OpenMV.
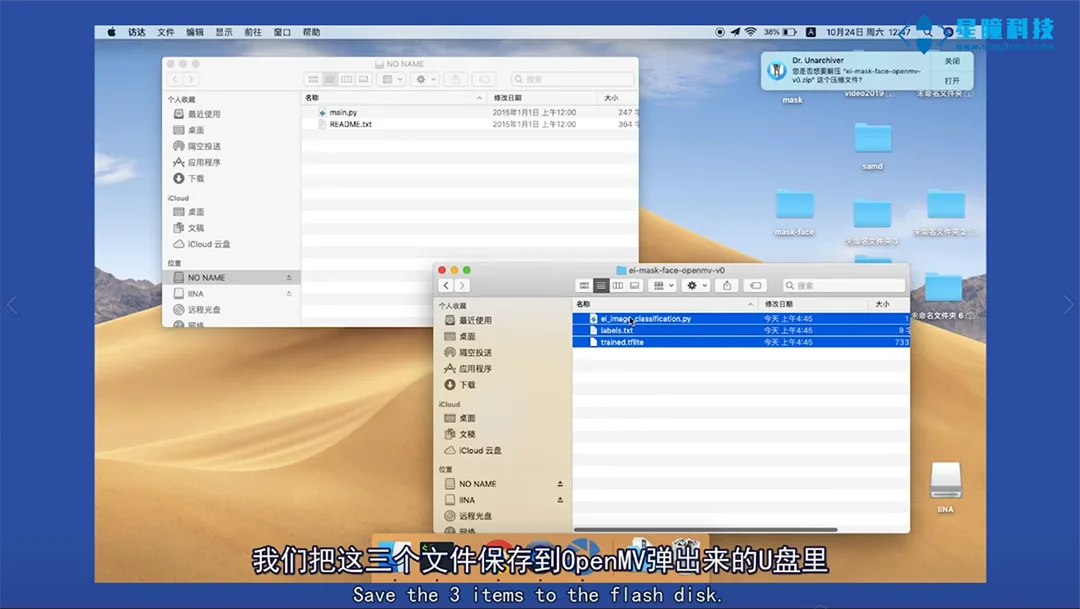
Connect to OpenMV IDE and save these three files to the built-in Flash of OpenMV. Open the ei_image_classification.py file in OpenMV IDE to view the code we just generated in EdgeImpulse. Click run, and the operation results will be displayed in the serial terminal.
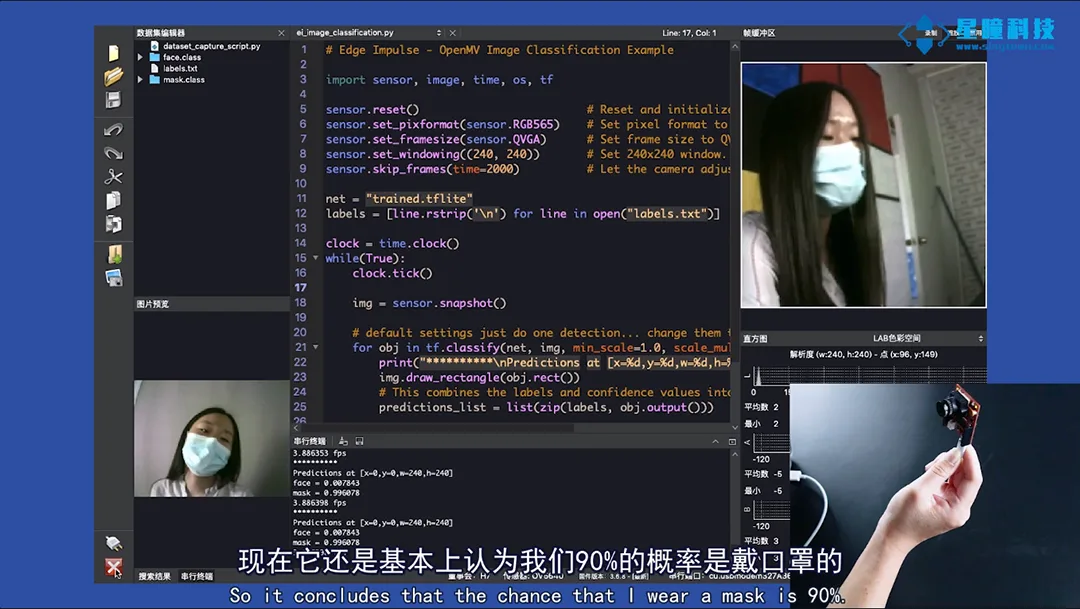
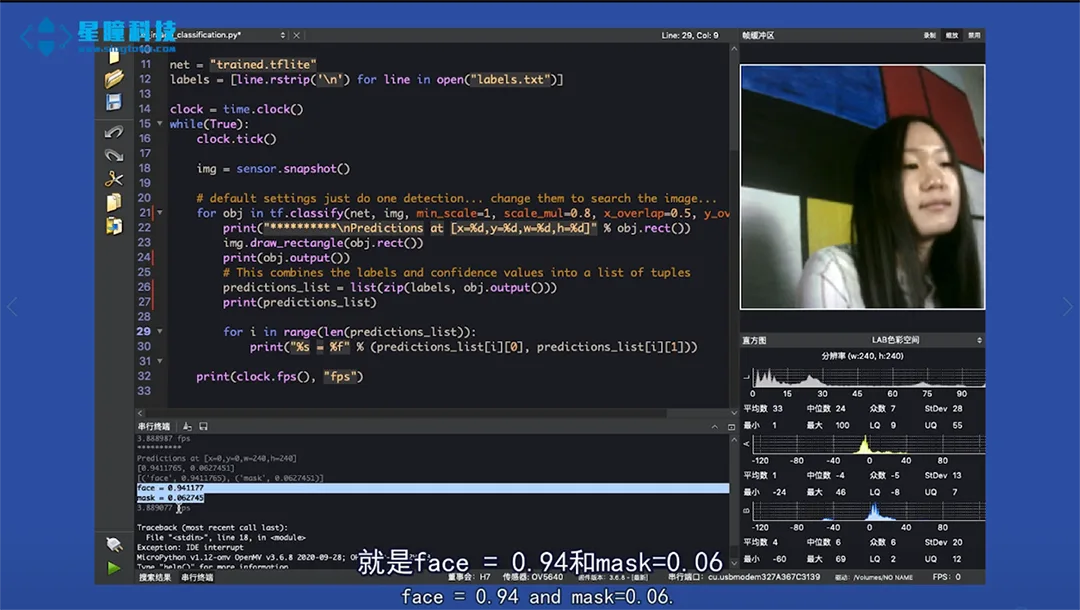
Alright, you've successfully added the capability for OpenMV to train neural networks on its own.
Looking forward to your results!
Related articles
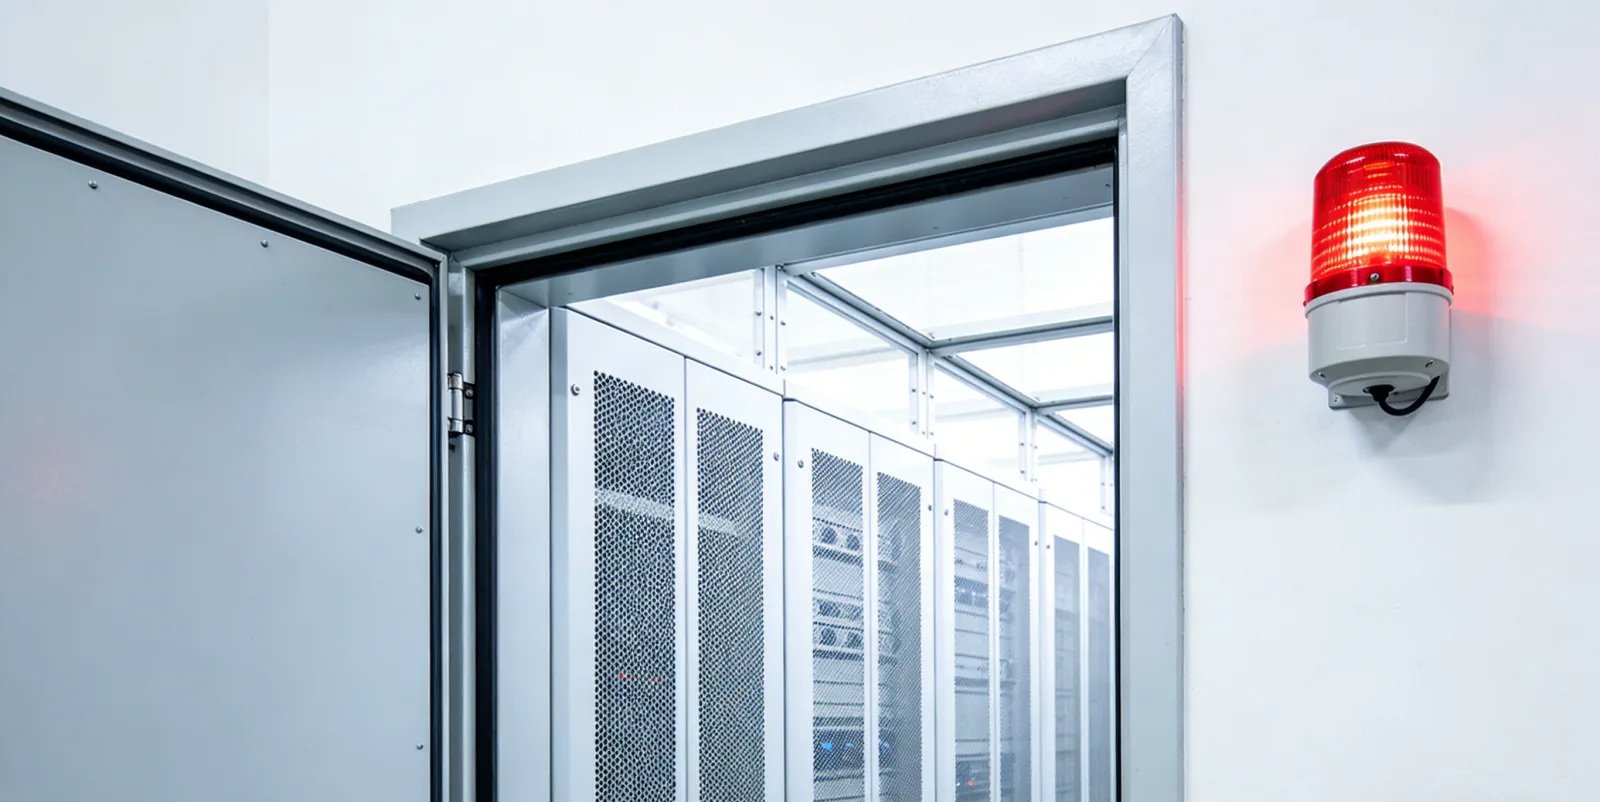
AI Sentinel Based on OpenMV: Automatic Alert for Unsecured Key Locations
Automatically detects whether the door of a key location has remained open for an extended period and issues timely alerts.
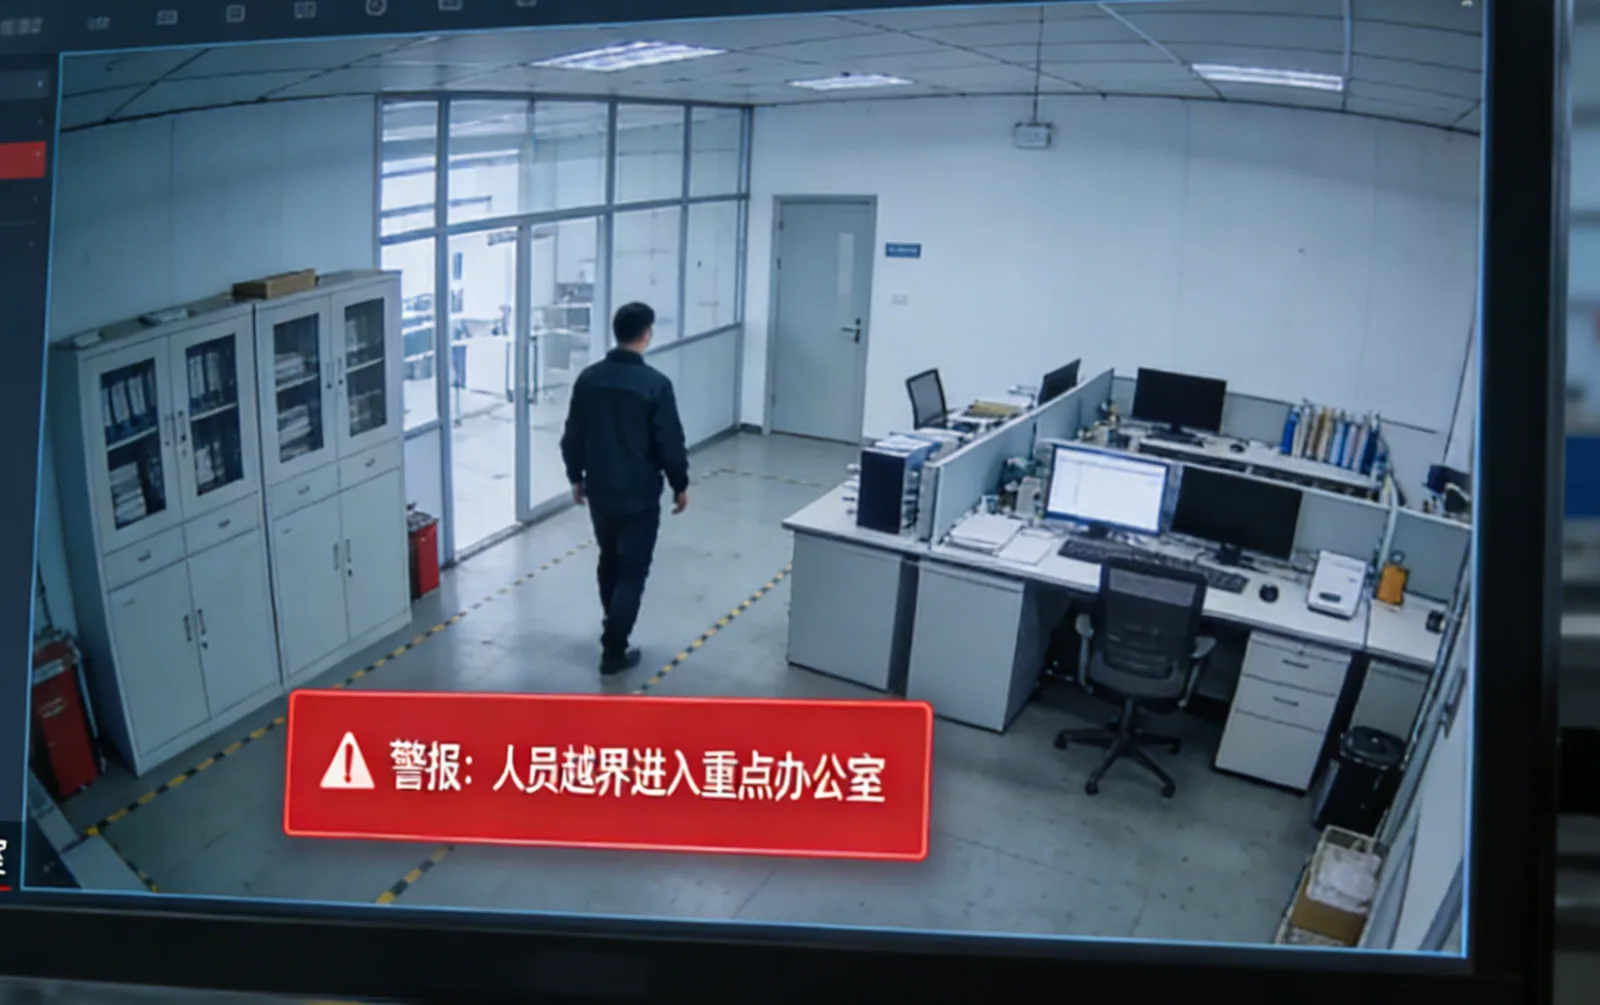
Personnel crossing boundary triggers an alert—OpenMV defines the “sense of safety boundary”
Detects personnel or equipment crossing virtual perimeter lines.
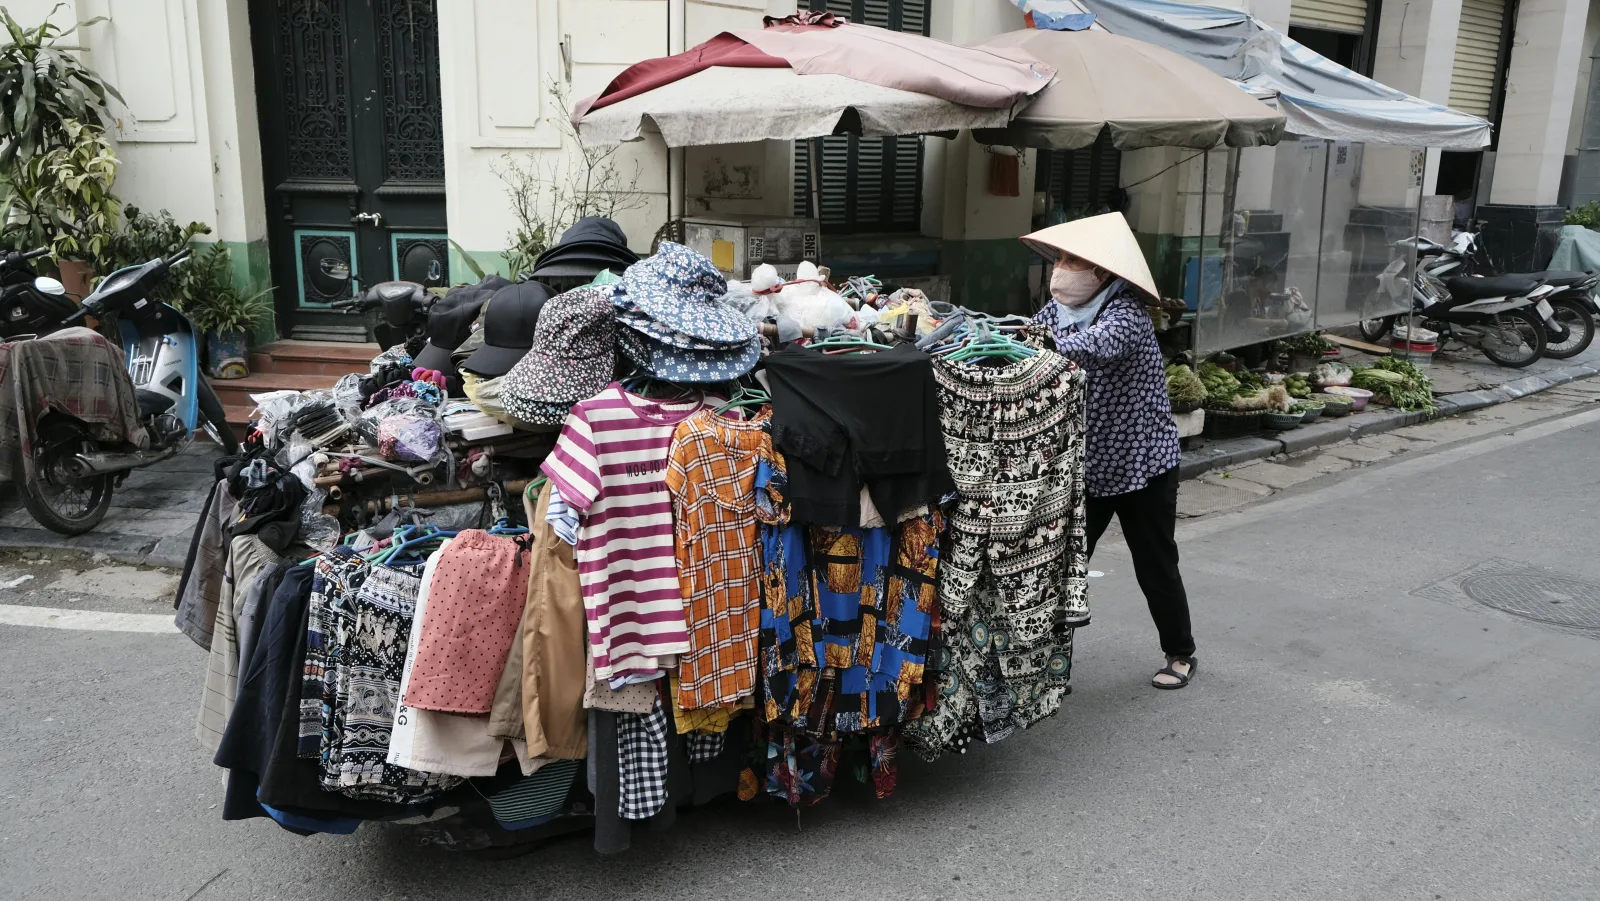
“AI Urban Management Officer” is here—a system for automatic identification of unauthorised street vending, built on OpenMV
Automatically identifies unauthorised street trading activities to support daily urban governance.
Improper storage of gas cylinders? Use OpenMV to automatically trigger hazard alerts
Automatically identifies non-compliant placement of gas cylinders to proactively detect potential gas safety hazards.
Did you perform live-line work without wearing insulating gloves? OpenMV issues an immediate alert!
Automatically identifies whether personnel are wearing insulating gloves to assist with safe operations.

Utilise the OpenMV smart camera to identify surface defects on aluminium plates in real time
Online identification of surface defects on aluminium sheets, such as scratches and dents, to support quality control.